contentPane = new JPanel();
		contentPane.setBackground(new Color(230, 230, 250));
		contentPane.setBorder(new EmptyBorder(5, 5, 5, 5));
		setContentPane(contentPane);
		contentPane.setLayout(null);
		ImageIcon logo  = new ImageIcon(getClass().getResource("res/logo.png"));
		Image logoImage = logo.getImage();
		Image newresizeableImage = logoImage.getScaledInstance(100, 100,java.awt.Image.SCALE_SMOOTH);
		logo = new ImageIcon(newresizeableImage)  ;
		JLabel label = new JLabel(logo);
		label.setBounds(10, 11, 52, 26);
		contentPane.add(label);
Author: Nusrat Faria
I Am A Web Developer And A Android Developer. This Is My Personal Blog So Noted My Work For Helping People .
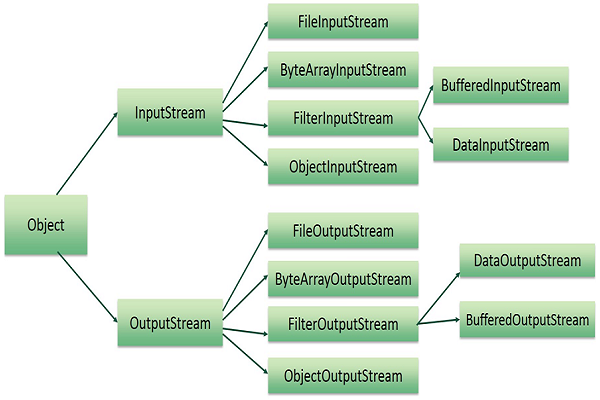
জাভা i/o ইনপুট /আউটপুট স্ট্রিম
স্ট্রিম হলে তথ্যের বা ডাটার সিকোয়েন্স যেখানে ডাটা সাজানো থাকে। জাভাতে ডাটা বা ফাইল ইনপুট (ডাটা গ্রহণ করতে ) ফাইল আউটপুট (ডাটা লিখতে ) bite (বইতে হলো ছোট ডাটা টাইপ )আকারে ডাটাকে কনভার্ট করে জাভা আউটপুট স্ট্রিম এবং জাভা ইনপুট স্ট্রিম এর কাজ করা হয়।
জাভা আউটপুট স্ট্রিম :জাভাতে কোনো ফাইল বা এরে তে ডাটা রাইট করতে জাভা আউটপুট স্ট্রিম ব্যবহার হয়। জাভা আউটপুট স্ট্রিম। আমরা যদি কোনো ফাইল এ লিখতে চাই তবে আমাদের প্রথমে FileOutputStream ক্লাস (যা OutputStream কে এসিটেন্ডস করেছে) এর একটি একটি অবজেক্ট তৈরী করতে হবে এবং কনস্ট্রাক্টর এর প্যারামিটার হিসাবে ফাইল এর সোর্স বা লোকেশন দিতে হবে এবং মনে রাখতে হবে আমরা যদি কোনো ক্যারেক্টর লিখতে চাই তবে ক্যারেক্টর এর ASCII নম্বর দিতে হবে কেননা জাভা আউটপুট স্ট্রিম হিসাবে ASCII ক্যারেক্টর নিয়ে ইনপুট এবং আউটপুট এর কাজ করে। যদি কোনো স্ট্রিং স্ট্রিম হিসাবে দেই তাহলে সে অটোমেটিক নিজেই আউটপুট বা ফাইল রাইট করে কিন্তু আমরা যদি ইন্টিজার বা নম্বর স্ট্রিম হিসাবে দেয় তখন সে ASCII ক্যারেক্টর আউটপুট বা রাইট করবে এখন প্রশ্ন হলো যদি আমার আউটপুট বা লিখা নম্বরই লাগবে তাহলে জাস্ট নম্বর কে স্ট্রিং এ কনভার্ট করে রাইট করতে হবে। আমরা যদি কোনো স্ট্রিং কে রাইট করতে চাই তবে সিম্পলি একটা জাভা স্ট্রিং ভ্যারিয়েবল এ স্ট্রিং টি স্টোরে করে তা একটি bite এরে তে কনভার্ট করে ফাইল হিসাবে দিয়ে আউটপুট বা লিখতে হবে।
ইনপুট
যখন আমরা ইনপুট আউটপুট স্ট্রিম এর কাজ করবো তখন ide eclips বা অন্য যেকোনো ide আমাদের এক্সসেপশন এবং try ক্যাচ এর পরামর্শঃ দেবে আমরা তা এপলাই করবো না হলে এরর শো করবে
import java.io.FileNotFoundException;
import java.io.FileOutputStream;
import java.io.IOException;

public class Hello {
	public static void main(String[] args) throws IOException {
	try {
		FileOutputStream fileOutputStream = new FileOutputStream("D:\\test.txt");
		String nameString = " My Name Is oLEE aHMMED aSHIK ";
		byte[] b = nameString.getBytes();
		// when We Write String Value To A File
		fileOutputStream.write(b);
		//fileOutputStream.write(b); when We Write Asiici Symbol unicode ba charecter
		fileOutputStream.flush();
		fileOutputStream.close();
		System.out.println("success");

	} catch (FileNotFoundException e) {
		// TODO Auto-generated catch block
		e.printStackTrace();
	}
	}


}
InputStream
import java.io.FileInputStream;
import java.io.FileNotFoundException;
import java.io.FileOutputStream;
import java.io.IOException;

public class Hello {
	public static void main(String[] args) throws IOException {
FileInputStream fileInputStream = new FileInputStream("D:\\test.txt");
 int i;
// i=  fileInputStream.read();// For Single Charecter Input
//For All Charecter Input
while ((i = fileInputStream.read())!=-1) {
	System.out.print((char)i); // jodi Char Na Dey Tahole file inputstream input hisabe asscii code debe kenona input stream unicode hisabe input ebong output grohon kore ebong pathanor somoy asscii hisabe pathai .
}	}


}

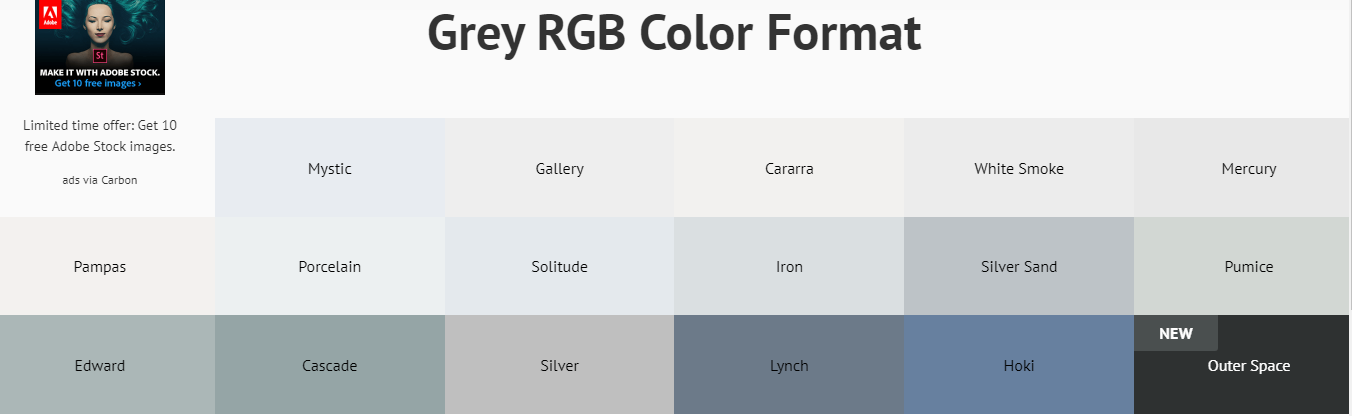
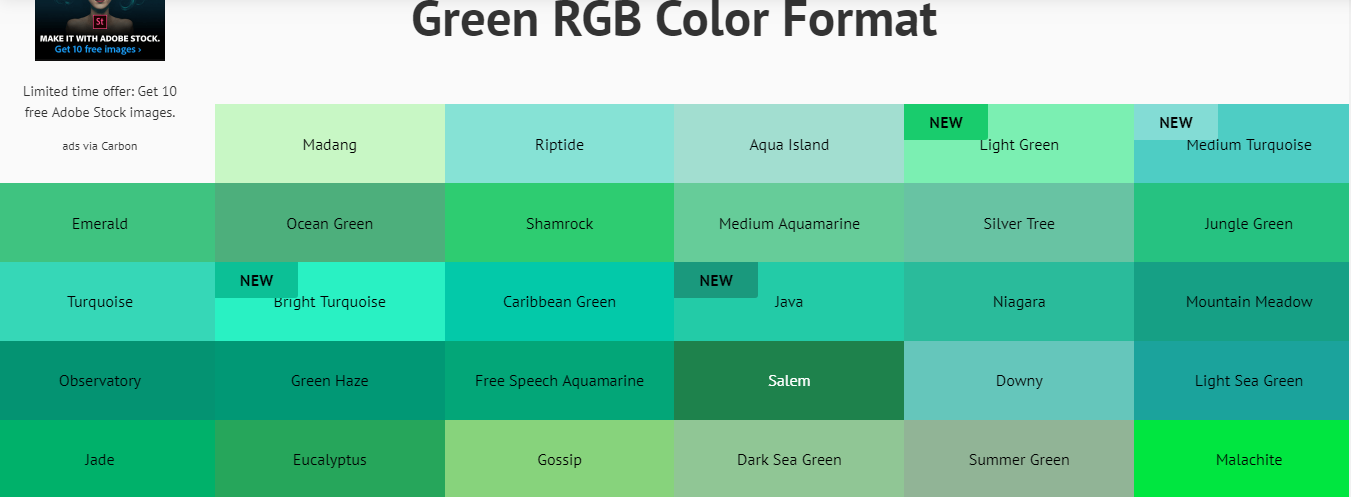
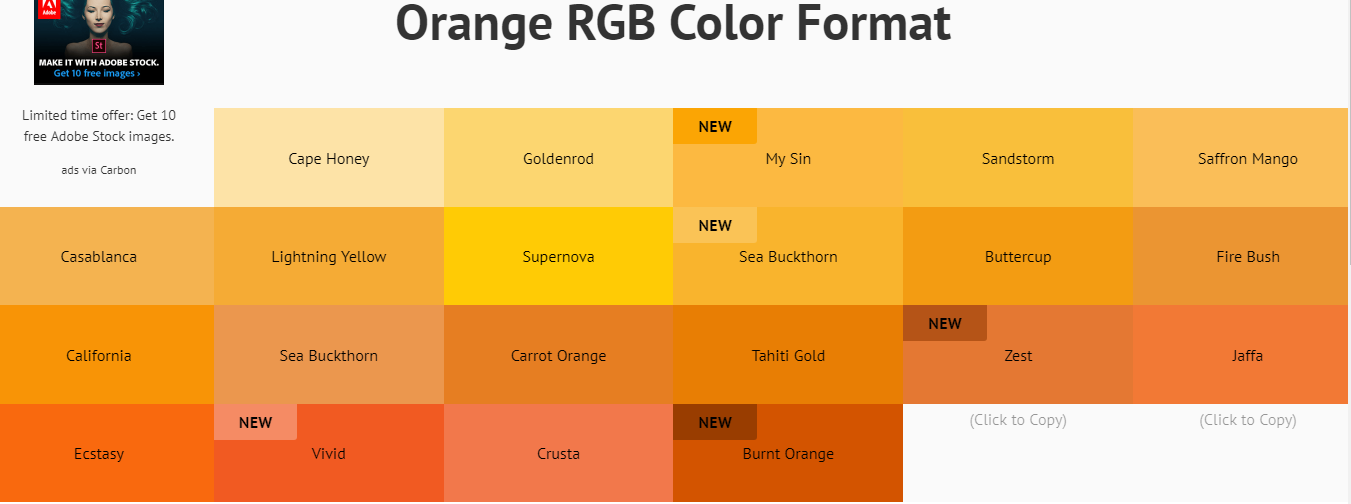
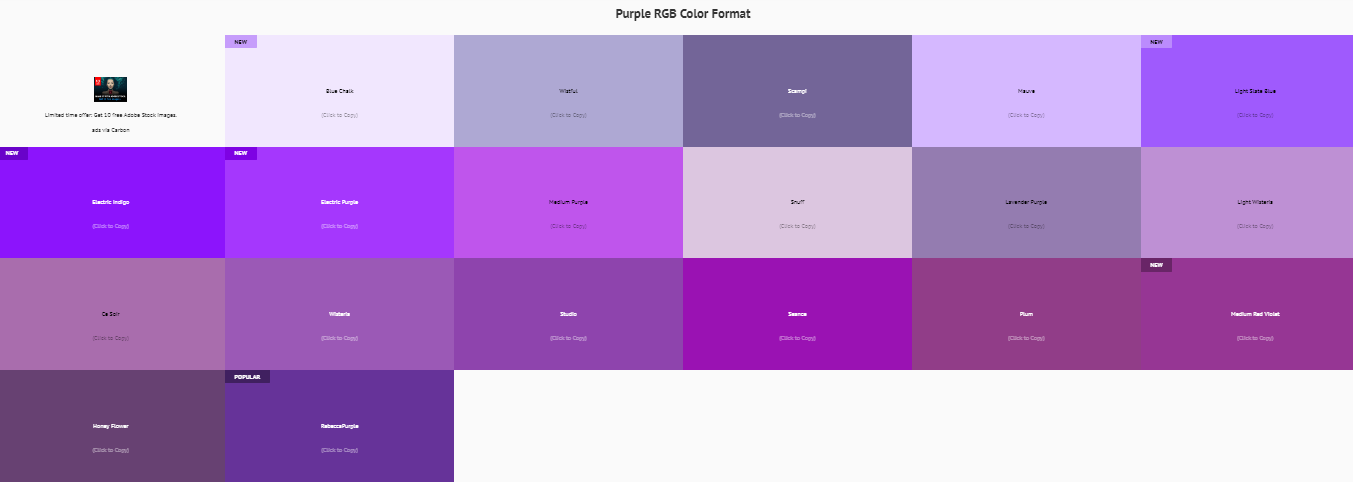
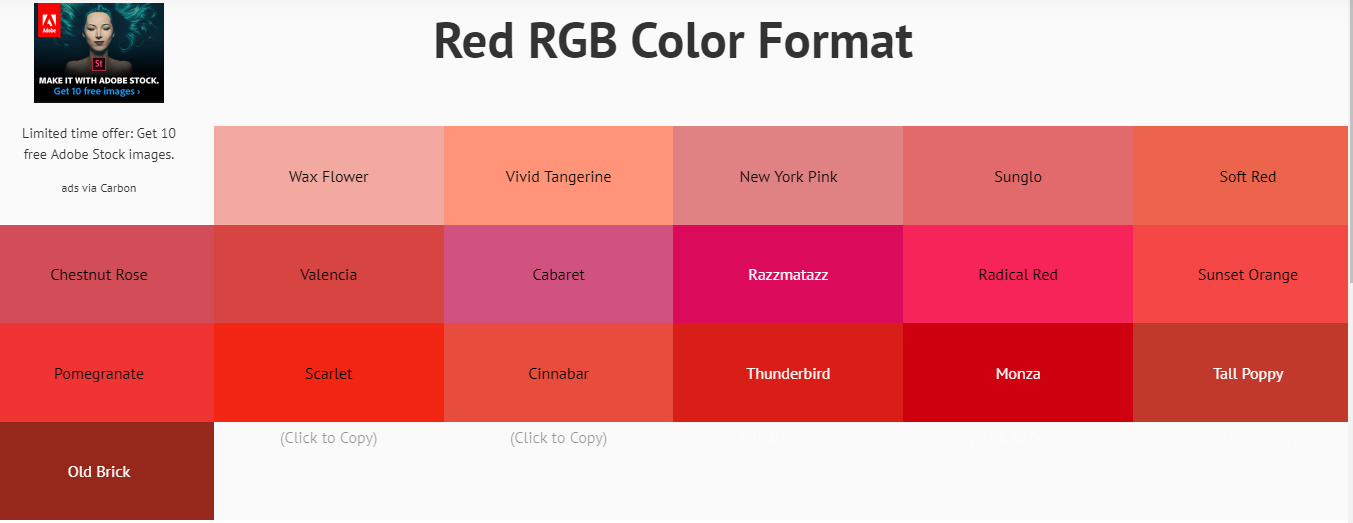
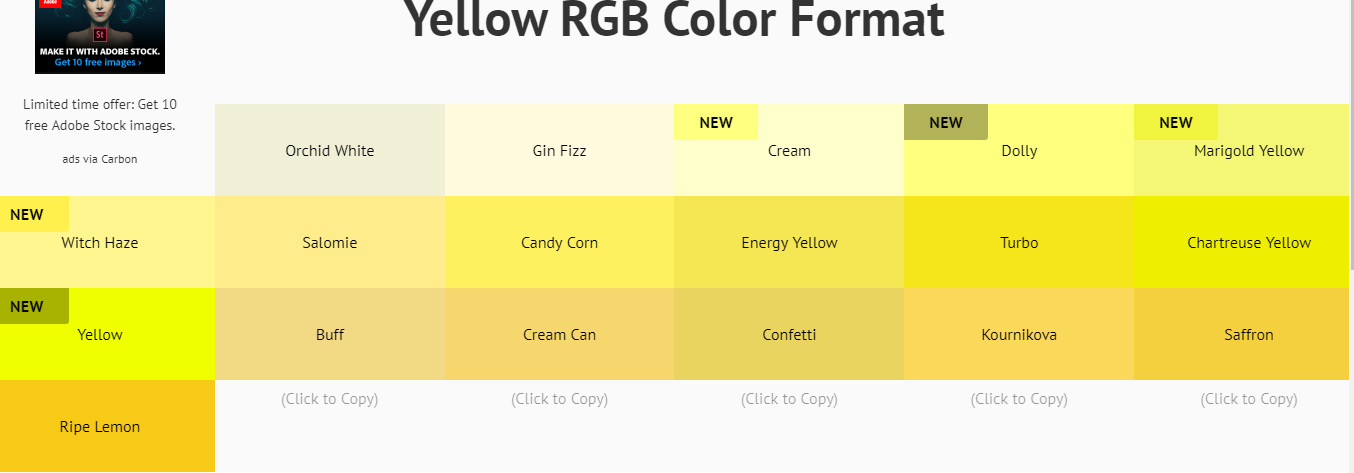
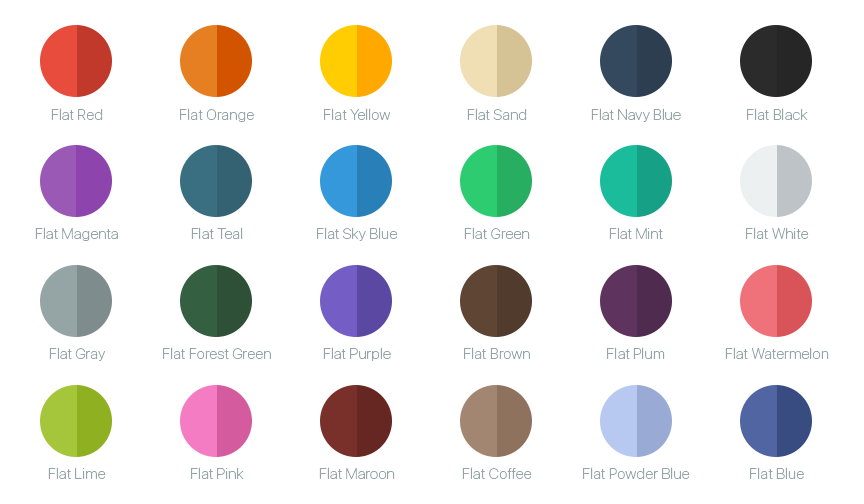
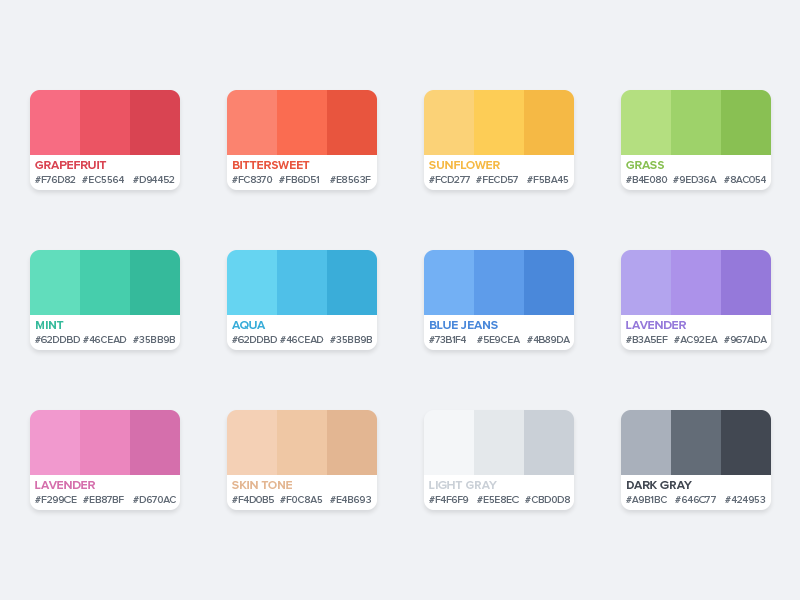
Color Palate For Design


Photoshop Shortcut

- Switch Foreground/Background Colours {Press (X). Fast way to switch between the selected colour.}
- Changing Opacity and Fill Opacity { Shift + Numeric Keys }
- Fill Color { Ctrl + Backspace – Foreground Color, Alt/Option + Backspace – Background Color, Shift + Backspace – Fill Options }
- Z: switch to the zoom tool And { Ctrl++: zoom in , Ctrl+-: zoom out }
- marquee selection tool {just click M Without any key} {Switch Another Marque Tool Shift+M}
- color picker (eyedropper) tool { just click I Without any key }
- brush tool { just click B Without any key }
- eraser tool { just click E Without any key }
- New Layer { Shift+Ctrl+N }
- Duplicate Layer { Ctrl+J }
- Lasso Tool { just click E Without any key }
- Quick Mask Shortcut { just click Q Without any key }
- How to Deselect { Ctrl+D }
- Invert Selection { Shift+Ctrl+I }
- Crop Tool { just click C Without any key }
- Undo { Ctrl+Z to undo ,} multiple times press Ctrl+Alt+Z Switch Foreground/Background Colours {Press (X). Fast way to switch between the selected colour.}
- Changing Opacity and Fill Opacity { Shift + Numeric Keys }
- Fill Color { Ctrl + Backspace – Foreground Color, Alt/Option + Backspace – Background Color, Shift + Backspace – Fill Options }
- Z: switch to the zoom tool And { Ctrl++: zoom in , Ctrl+-: zoom out }
- marquee selection tool {just click M Without any key} {Switch Another Marque Tool Shift+M}
- color picker (eyedropper) tool { just click I Without any key }
- brush tool { just click B Without any key }
- eraser tool { just click E Without any key }
- New Layer { Shift+Ctrl+N }
- Duplicate Layer { Ctrl+J }
- Lasso Tool { just click E Without any key }
- Quick Mask Shortcut { just click Q Without any key }
- How to Deselect { Ctrl+D }
- Invert Selection { Shift+Ctrl+I }
- Crop Tool { just click C Without any key }
- Undo { Ctrl+Z to undo , multiple times press Ctrl+Alt+Z , Edit>Preferences> Performance you can enter the number of History steps you want Photoshop to save }
- Merge and Unmerge Layers { Crtl+E }
- Image Size{ Crtl+Alt+Q }
- Select All Layers { press Ctrl+Alt+A }
- Select Bottom Layer { Alt+Comma(,) }
- Select Top Layer {}
- Alt+(.)
Android RecyclerView Onclick New Activity Custom Adapter

dependency
dependencies {
    implementation fileTree(dir: 'libs', include: ['*.jar'])
    implementation 'com.android.support:appcompat-v7:28.0.0'
    implementation 'com.android.support.constraint:constraint-layout:1.1.3'
    implementation 'com.android.support:recyclerview-v7:28.0.0'

    testImplementation 'junit:junit:4.12'
    androidTestImplementation 'com.android.support.test:runner:1.0.2'
    androidTestImplementation 'com.android.support.test.espresso:espresso-core:3.0.2'
}
- Activity_main.xml
<?xml version="1.0" encoding="utf-8"?>
<LinearLayout xmlns:android="http://schemas.android.com/apk/res/android"
    xmlns:app="http://schemas.android.com/apk/res-auto"
    xmlns:tools="http://schemas.android.com/tools"
    android:layout_width="match_parent"
    android:layout_height="match_parent"
    tools:context=".MainActivity">

<android.support.v7.widget.RecyclerView
    android:id="@+id/recyclerview"
    android:layout_width="match_parent"
    android:layout_height="match_parent"></android.support.v7.widget.RecyclerView>

</LinearLayout>
2. mylist.xml
<?xml version="1.0" encoding="utf-8"?>
<LinearLayout
    xmlns:android="http://schemas.android.com/apk/res/android" android:layout_width="match_parent"
   android:orientation="vertical"
    android:id="@+id/linearLayout"
    android:layout_height="match_parent">

<TextView
    android:id="@+id/name"
    android:layout_width="match_parent"
    android:layout_height="wrap_content" />

    <ImageView
        android:id="@+id/logo"
        android:layout_width="match_parent"
        android:layout_height="wrap_content" />
</LinearLayout>
details_activity.xml
<?xml version="1.0" encoding="utf-8"?>
<LinearLayout xmlns:android="http://schemas.android.com/apk/res/android"
    xmlns:app="http://schemas.android.com/apk/res-auto"
    xmlns:tools="http://schemas.android.com/tools"
    android:layout_width="match_parent"
    android:layout_height="match_parent"
    tools:context=".Detailview">
<TextView
    android:id="@+id/text"
    android:layout_width="match_parent"
    android:layout_height="wrap_content" />
</LinearLayout>
Mainactivity.java
package sap.business.one.recycleonclick;

import android.support.v7.app.AppCompatActivity;
import android.os.Bundle;
import android.support.v7.widget.GridLayoutManager;
import android.support.v7.widget.RecyclerView;

import java.util.ArrayList;

public class MainActivity extends AppCompatActivity {
private RecyclerView recyclerView;
private ArrayList <Movie> list = new ArrayList<Movie>(  );
private  Myadapter myadapter;

    @Override
    protected void onCreate(Bundle savedInstanceState) {
        super.onCreate( savedInstanceState );
        setContentView( R.layout.activity_main );
        recyclerView = findViewById( R.id.recyclerview );
        GridLayoutManager gridLayoutManager = new GridLayoutManager( this,2 );
        recyclerView.setLayoutManager( gridLayoutManager );
        myadapter = new Myadapter( this,list );
        recyclerView.setAdapter( myadapter );
        list.add( new Movie( "ashik",R.drawable.admin ) );
        list.add( new Movie( "Virat",R.drawable.person ) );
        list.add( new Movie( "Rohit",R.drawable.finance ) );
        list.add( new Movie( "Shakib",R.drawable.sales ) );
    }
}
detailsview.java
package sap.business.one.recycleonclick;

import android.support.v7.app.AppCompatActivity;
import android.os.Bundle;
import android.widget.TextView;

public class Detailview extends AppCompatActivity {
private TextView textView;

    @Override
    protected void onCreate(Bundle savedInstanceState) {
        super.onCreate( savedInstanceState );
        setContentView( R.layout.activity_detailview );
        textView = findViewById( R.id.text );
String name = getIntent().getStringExtra( "name" ).trim();
textView.setText( name );

    }
}
Movie.java
package sap.business.one.recycleonclick;

public class Movie {
    String name;
    int logo;

    public Movie(String name,int logo) {
        this.name = name;
        this.logo = logo;
    }

    public String getName() {
        return name;
    }

    public void setName(String name) {
        this.name = name;
    }

    public int getLogo() {
        return logo;
    }

    public void setLogo(int logo) {
        this.logo = logo;
    }
}
Myadapder.java
package sap.business.one.recycleonclick;

import android.content.Context;
import android.content.Intent;
import android.support.annotation.NonNull;
import android.support.v7.widget.RecyclerView;
import android.view.LayoutInflater;
import android.view.View;
import android.view.ViewGroup;
import android.widget.ImageView;
import android.widget.LinearLayout;
import android.widget.TextView;

import java.util.ArrayList;

public class Myadapter extends RecyclerView.Adapter<Myadapter.Holder> {

    Context context;
    ArrayList<Movie> list;

    public Myadapter(Context context,ArrayList<Movie> list) {
        this.context = context;
        this.list = list;
    }

    @NonNull
    @Override
    public Holder onCreateViewHolder(@NonNull ViewGroup viewGroup,int i) {
        View view = LayoutInflater.from( context ).inflate( R.layout.mylist,viewGroup,false );
        Holder holder = new Holder( view );
        return holder;
    }

    @Override
    public void onBindViewHolder(@NonNull Holder holder,int i) {
final Movie movie = list.get( i );
holder.name.setText( movie.name );
holder.logo.setImageResource( movie.logo );
holder.linearLayout.setOnClickListener( new View.OnClickListener() {
    @Override
    public void onClick(View v) {
        Intent intent = new Intent( context,Detailview.class );
        intent.putExtra( "name",movie.getName() );
        context.startActivity( intent );
    }
} );
    }

    @Override
    public int getItemCount() {
        return list.size();
    }

    public class Holder extends RecyclerView.ViewHolder {
        public TextView name;
        public ImageView logo;
        public LinearLayout linearLayout;
        public Holder(@NonNull View itemView) {
            super( itemView );
            name = itemView.findViewById(  R.id.name);
            logo = itemView.findViewById(  R.id.logo);
            linearLayout = itemView.findViewById(  R.id.linearLayout);

        }
    }
}
Android Shared Preference

Android Shared Preference Save And Read Data From One Activity Class To Another Activity Class.
To Save Android Shared Preference At ServerConfiguration.java
 SharedPreferences sharedPref = getSharedPreferences("server", 0); // Here server is SharedPreferences name
                SharedPreferences.Editor editor = sharedPref.edit();
                editor.putString("url",urltext); // url is key and urltext is String get from edit text
                editor.putString("username",usernametext); // username is key and usernametext is String get from edit text
                editor.putString("password",passwordtext); // password is key and passwordtext is String get from edit text
                editor.commit();
To Get Android Shared Preference At Mainactivity.java
       // For Get Shared Preference

        SharedPreferences mPrefs = getSharedPreferences("server",0);


        if (mPrefs.contains("url")) {
            String str = mPrefs.getString("url", "");
            urlsp.setText(str);
        }
        if (mPrefs.contains("username")) {

        }

        if (mPrefs.contains("password")) {

        }
Android Ui Design Code

GridFiew Border
GridView gv = findViewById(R.id.my_grid_view);
gv.setBackgroundColor(Color.WHITE);
gv.setVerticalSpacing(1);
gv.setHorizontalSpacing(1);
Border Background
<?xml version="1.0" encoding="utf-8"?>
<shape xmlns:android="http://schemas.android.com/apk/res/android"
    android:shape="rectangle">
    <stroke android:color="@color/blue" android:width="1dp"/>
    <corners android:radius="5dp" />
</shape>
Linear Gradiant Background 2 Color
<?xml version="1.0" encoding="utf-8"?>
<shape xmlns:android="http://schemas.android.com/apk/res/android"
    android:shape="rectangle">
    <gradient
        android:angle="90"
        android:startColor="#FFFF0000"
        android:endColor="#FF00FF00"
        android:type="linear"/>
</shape>
Gradiant Background 3 Color
<shape
    xmlns:android="http://schemas.android.com/apk/res/android"
    android:shape="rectangle">
    <gradient
        android:startColor="#000000"
        android:centerColor="#5b5b5b"
        android:endColor="#000000"
        android:angle="0" />
</shape>
How To Use Custom Font In Android Apps
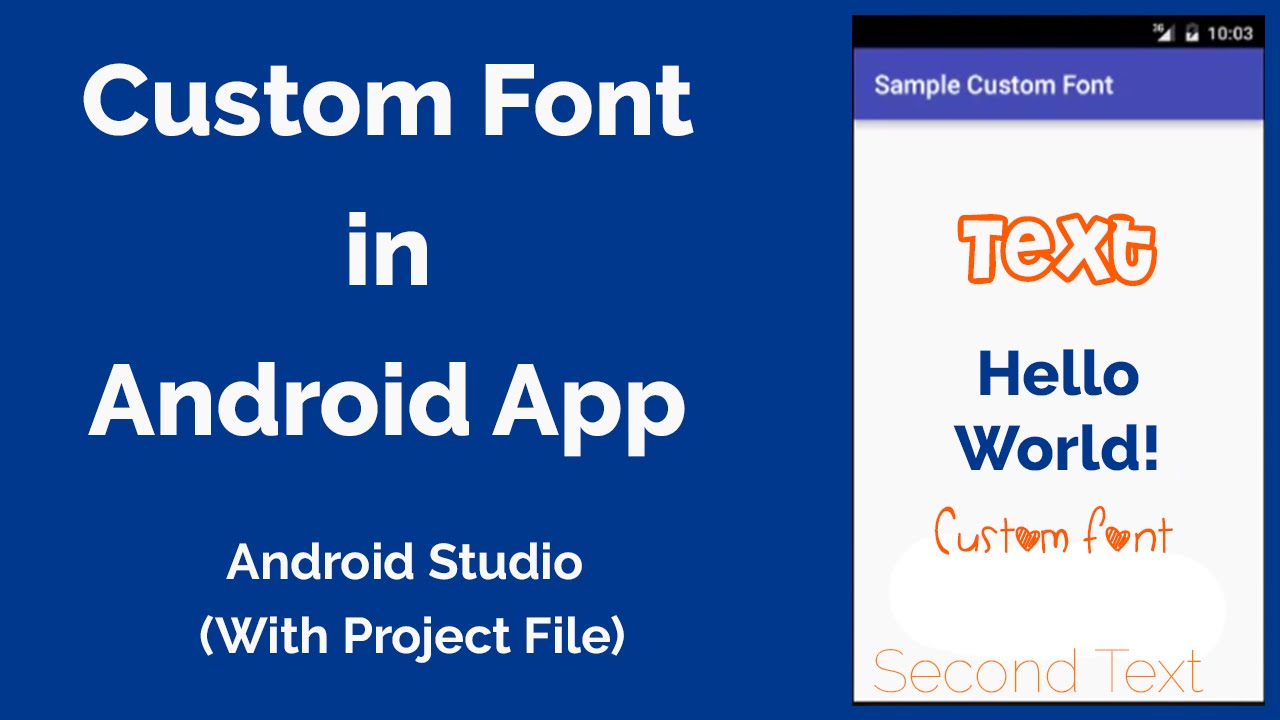
1. Create an assets fonder in your app’s main directory then copy and paste all .ttf font files which you are going to used inside assets folder.
2. In Mainactivity.javafile Like This Way
ublic class MainActivity extends AppCompatActivity {

    @Override
    protected void onCreate(Bundle savedInstanceState) {
        super.onCreate(savedInstanceState);
        setContentView(R.layout.activity_main);

        String customFont = "Carrington.ttf";
        Typeface typeface = Typeface.createFromAsset(getAssets(), customFont);
        TextView textView = (TextView) findViewById(R.id.custom_text);
        TextView textView1 = (TextView) findViewById(R.id.custom_text1);
        textView.setTypeface(typeface);
        textView1.setTypeface(typeface);
    }
}
How To Use Fontawesome In Android Studio
- Download Fontawesome Font And Find fontawesome-webfont.ttf .
- Past Font In assets folder inside main folder
- Copy Font Awesome Icon Code From Fontawesome Chetcheet Here Is Link
- Store Fontawesome Icon Code In String.xml file As A Resorce File
<resources>
<string name="app_name">FontAwesome Icons In Android Application</string>
<string name="font_awesome_android_icon"></string>
<string name="font_awesome_area_chart_icon"></string>
<string name="font_awesome_cubes_icon"></string>
<string name="font_awesome_mobile_phone_icon"></string>
</resources>
use Icon Name In Textview Or Anoter As text
  <TextView
        android:id="@+id/font_awesome_android_icon"
        android:layout_width="wrap_content"
        android:layout_height="wrap_content"

        android:gravity="center_horizontal"
        android:text="@string/taxy"
        android:textColor="#80d204"
        android:textSize="50sp" />
MAin Activity
   TextView fontAwesomeAndroidIcon = (TextView) findViewById(R.id.font_awesome_android_icon);
        Typeface fontawasmoe = Typeface.createFromAsset(getAssets(), "fontawesome-webfont.ttf");
        fontAwesomeAndroidIcon.setTypeface(fontawasmoe);
Inventory Template Android Xml Ready
Normal Purchase Template

MAinactivity.xml
Use A Recyclerview To Fill Item Data after
<?xml version="1.0" encoding="utf-8"?>
<RelativeLayout xmlns:android="http://schemas.android.com/apk/res/android"
    xmlns:app="http://schemas.android.com/apk/res-auto"
    xmlns:tools="http://schemas.android.com/tools"
    android:layout_width="match_parent"
    android:layout_height="match_parent"
    android:orientation="vertical"
    android:background="#ffffff"
    >
    <LinearLayout
        android:layout_width="match_parent"
        android:layout_height="wrap_content"
        android:orientation="vertical"
        android:background="#ffffff">

        <LinearLayout
            android:layout_width="50dp"
            android:layout_height="50dp"
            android:layout_gravity="center_horizontal"
            android:background="@drawable/circle4"
            android:layout_marginTop="30dp">
            <ImageView
                android:layout_width="30dp"
                android:layout_height="30dp"
                android:layout_gravity="center"
                android:layout_marginLeft="12dp"
                android:layout_marginBottom="2dp"
                android:src="@drawable/ic_hot_chocolate_cup1"/>
        </LinearLayout>
        <TextView       android:layout_width="wrap_content"
            android:layout_height="wrap_content"
            android:textSize="12dp"
            android:text="Normal purchase"
            android:textColor="#000"
            android:layout_gravity="center_horizontal"
            android:layout_marginTop="15dp"/>
        <LinearLayout
            android:layout_width="wrap_content"
            android:layout_height="wrap_content"
            android:orientation="horizontal"
            android:layout_gravity="center_horizontal"
            android:layout_marginTop="20dp">
            <ImageView
                android:layout_width="wrap_content"
                android:layout_height="wrap_content"
                android:src="@drawable/ic_british_pound_symbol"
                android:layout_marginTop="10dp"/>
            <TextView           android:layout_width="wrap_content"
                android:layout_height="wrap_content"
                android:textColor="#000"
                android:text="7.85"
                android:textSize="37dp"/>

        </LinearLayout>
        <View
            android:layout_width="match_parent"
            android:layout_height="0.7dp"
            android:background="#b1b1b1"
            android:layout_marginTop="30dp"/>
        <LinearLayout
            android:layout_width="match_parent"
            android:layout_height="wrap_content"
            android:orientation="horizontal"
            android:layout_marginLeft="15dp"
            android:layout_marginRight="15dp"
            android:layout_marginTop="15dp">
            <TextView           android:layout_width="wrap_content"
                android:layout_height="wrap_content"
                android:textSize="12dp"
                android:layout_weight="1"
                android:text="ITEAM"

                android:textColor="#b1b1b1"/>
            <TextView           android:layout_width="wrap_content"
                android:layout_height="wrap_content"
                android:textSize="12dp"
                android:layout_weight="1"
                android:gravity="center"
                android:text="QTY"
                android:layout_marginLeft="50dp"
                android:textColor="#b1b1b1"/>
            <TextView           android:layout_width="wrap_content"
                android:layout_height="wrap_content"
                android:layout_weight="1"
                android:textSize="12dp"
                android:gravity="right"
                android:text="PRICE"
                android:textColor="#b1b1b1"/>
        </LinearLayout>

        <LinearLayout
            android:layout_width="0dp"
            android:layout_height="wrap_content"
            android:orientation="vertical"
            android:layout_weight="1.8"
            >

            <TextView          android:layout_width="wrap_content"
                android:layout_height="wrap_content"
                android:textColor="#000"
                android:textSize="13dp"
                android:id="@+id/iteamName"
                android:text="Orange and Rosemerry"/>
        </LinearLayout>
        <LinearLayout
            android:layout_width="0dp"
            android:layout_height="wrap_content"
            android:orientation="vertical"
            android:layout_gravity="center"
            android:gravity="center"
            android:layout_weight="0.8">

            <TextView          android:layout_width="wrap_content"
                android:layout_height="wrap_content"
                android:id="@+id/quantity"
                android:textColor="#000"
                android:textSize="13dp"
                android:layout_marginLeft="5dp"
                android:text="1"/>
        </LinearLayout>

        <LinearLayout
            android:layout_width="0dp"
            android:layout_height="wrap_content"
            android:orientation="vertical"
            android:gravity="right"
            android:layout_weight="1.2">

            <LinearLayout
                android:layout_width="wrap_content"
                android:layout_height="wrap_content"
                android:orientation="horizontal">
                <ImageView
                    android:layout_width="12dp"
                    android:layout_height="12dp"
                    android:layout_marginTop="4dp"
                    android:src="@drawable/ic_british_pound_symbol"/>
                <TextView          android:layout_width="wrap_content"
                    android:layout_height="wrap_content"
                    android:id="@+id/price"
                    android:textColor="#000"
                    android:textSize="13dp"
                    android:text="2.3"/>
            </LinearLayout>
        </LinearLayout>
        <View
            android:layout_width="match_parent"
            android:layout_height="0.7dp"
            android:background="#b1b1b1"
            android:layout_marginLeft="15dp"
            android:layout_marginRight="15dp"
            android:layout_marginTop="5dp"/>
        <LinearLayout
            android:layout_width="match_parent"
            android:layout_height="wrap_content"
            android:orientation="horizontal"
            android:layout_marginTop="15dp">
            <TextView           android:layout_width="wrap_content"
                android:layout_height="wrap_content"
                android:text="VAT"
                android:layout_marginLeft="15dp"
                android:textSize="12dp"
                android:layout_weight="1"
                android:textColor="#b1b1b1"/>
            <ImageView
                android:layout_width="10dp"
                android:layout_height="10dp"
                android:layout_marginTop="3dp"
                android:src="@drawable/ic_pound"/>
            <TextView           android:layout_width="wrap_content"
                android:layout_height="wrap_content"
                android:text="7.85"
                android:textSize="12dp"
                android:layout_marginRight="15dp"
                android:textColor="#b1b1b1"/>
        </LinearLayout>
        <LinearLayout
            android:layout_width="match_parent"
            android:layout_height="wrap_content"
            android:orientation="horizontal"
            android:layout_marginTop="10dp">
            <TextView
                android:layout_width="wrap_content"
                android:layout_height="wrap_content"
                android:text="Total"
                android:layout_marginLeft="15dp"
                android:textSize="12dp"
                android:layout_weight="1"
                android:textColor="#000"/>

            <ImageView
                android:layout_width="9dp"
                android:layout_height="10dp"
                android:layout_marginTop="3dp"
                android:src="@drawable/ic_british_pound_symbol" />
            <TextView
                android:layout_width="wrap_content"
                android:layout_height="wrap_content"
                android:text="7.85"
                android:textSize="12dp"
                android:layout_marginRight="15dp"
                android:textColor="#000"/>
        </LinearLayout>
    </LinearLayout>
    <LinearLayout
        android:layout_width="match_parent"
        android:layout_height="wrap_content"
        android:background="#f6f8f9"
        android:layout_alignParentBottom="true"
        android:paddingBottom="20dp"
        android:paddingTop="20dp"
        android:gravity="center_horizontal">
        <TextView       android:layout_width="wrap_content"
            android:layout_height="wrap_content"
            android:text="Digital receipt powered by"
            android:textSize="12dp"
            android:textColor="#b1b1b1"/>
        <TextView
            android:layout_width="wrap_content"
            android:layout_height="wrap_content"
            android:text="flux"
            android:layout_marginLeft="3dp"
            android:textSize="12dp"
            android:textColor="#b1b1b1"/>
    </LinearLayout>
</RelativeLayout>
Drawable File Link

Sql Join Query Tutorial
Sql INNER JOIN বাংলা
Sql INNER JOIN উভয় টেবিলে যে ডাটা আছে সেই ডাটা নিয়ে আসবে।
মনে কর তোমার কাছে তিনটা টেবিল আছে ১. স্টুডেন্ট {id,name } ২.pass {id,marks }৩.fail {id,marks }
এখন তুমি চাচ্ছ কোন কোন স্টুডেন্ট ফেল করেছে। inner join এর কাজ হলো উভয় টেবিলে যে ডাটা গুলো মিলবে সেই ডাটা সে যৌন করে শো করবে।
যেমন স্টুডেন্ট টেবিলে অনেক id থাকতে পারে যার মধ্যে অনেকে পরীক্ষা দেয়নি আবার অনেকে স্কুল হতে চলে গেছে। এখন তুমি যদি inner join করো তাহলে কোয়েরি প্রথমে তোমার join অনুযায়ী কলামের ডাটা সাজাবে যেই ডাটা গুলো দুইটি টেবিল এই আছে। যেমন যারা পাশ করেছি তাদের id অবশ্যই student টেবিলে আছে কেননা student টেবিলটি মাস্টার ডাটা বহন করে এবং সব সময় তা আপডেট থাকে স্টুডেন্ট ভর্তির সময়। এক্ষেত্রে আমরা পাশ বা ফেল আলাদা ভাবে ডাটা দেখতে পাবো।
- Get Data From Two Table
2. If You Filtering Data Then You Use Filtering Operator See Below
SELECT  company.company_id,company.company_name,
foods.item_id,foods.item_name
FROM company,foods;
//Operators
>
<
=
<=
=>
!=
LIKE
AND
OR
WHERE
ON
3. Get Data From 2 Table Based On Join
SELECT orders.order_id, suppliers.name
FROM suppliers
INNER JOIN orders
ON suppliers.supplier_id = orders.supplier_id
ORDER BY order_id;
4 . Select Data From Multiple Table
SELECT p.pid, p.cid, p.pname, c1.name1, c2.name2
FROM product p
LEFT JOIN customer1 c1 ON p.cid = c1.cid
LEFT JOIN customer2 c2 ON p.cid = c2.cid
5 .Select Data From Multiple Table Based On Multiple Condition
SELECT a.ord_num,b.cust_name,a.cust_code,
c.agent_code,b.cust_city
FROM agents c,customer b,orders a
WHERE b.cust_city=c.working_area
AND a.cust_code=b.cust_code
AND a.agent_code=c.agent_code;
